Borrowing & Lending
Lend units to people with due dates, and track everything that's currently out.
When equipment goes out to a person rather than another folder, use Lend instead of Move. Lending keeps a due date, sends the borrower a confirmation email, and shows up separately from ordinary relocations.
Adding borrowers
Before you can lend something to someone, they need to be listed under Borrowers on the People page:
- Open People from the sidebar.
- Click Add Borrower and fill in their Full Name and Email.
Borrowers are lightweight accounts — they don’t get access to the operational app, they’re just the recipient of a loan. They don’t take a seat on your plan, so you can add as many as you need. If a borrower later needs to log in and use Invy themselves, use Promote to Team on their row to turn them into a full team member (that does take a seat).
The Lend dialog also lists people without an account — individuals recorded as owners of personal items. Lending a company item to one of them gives them a borrower account from their email, and they stay a borrower afterwards.
Personal items can’t be lent through Invy. They belong to their owners, who lend them outside the app.
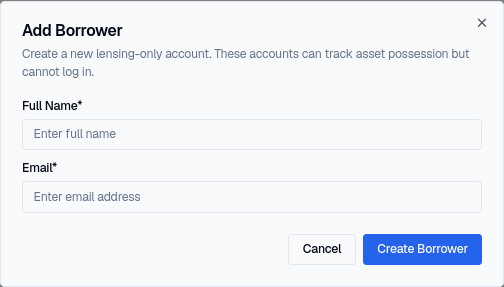
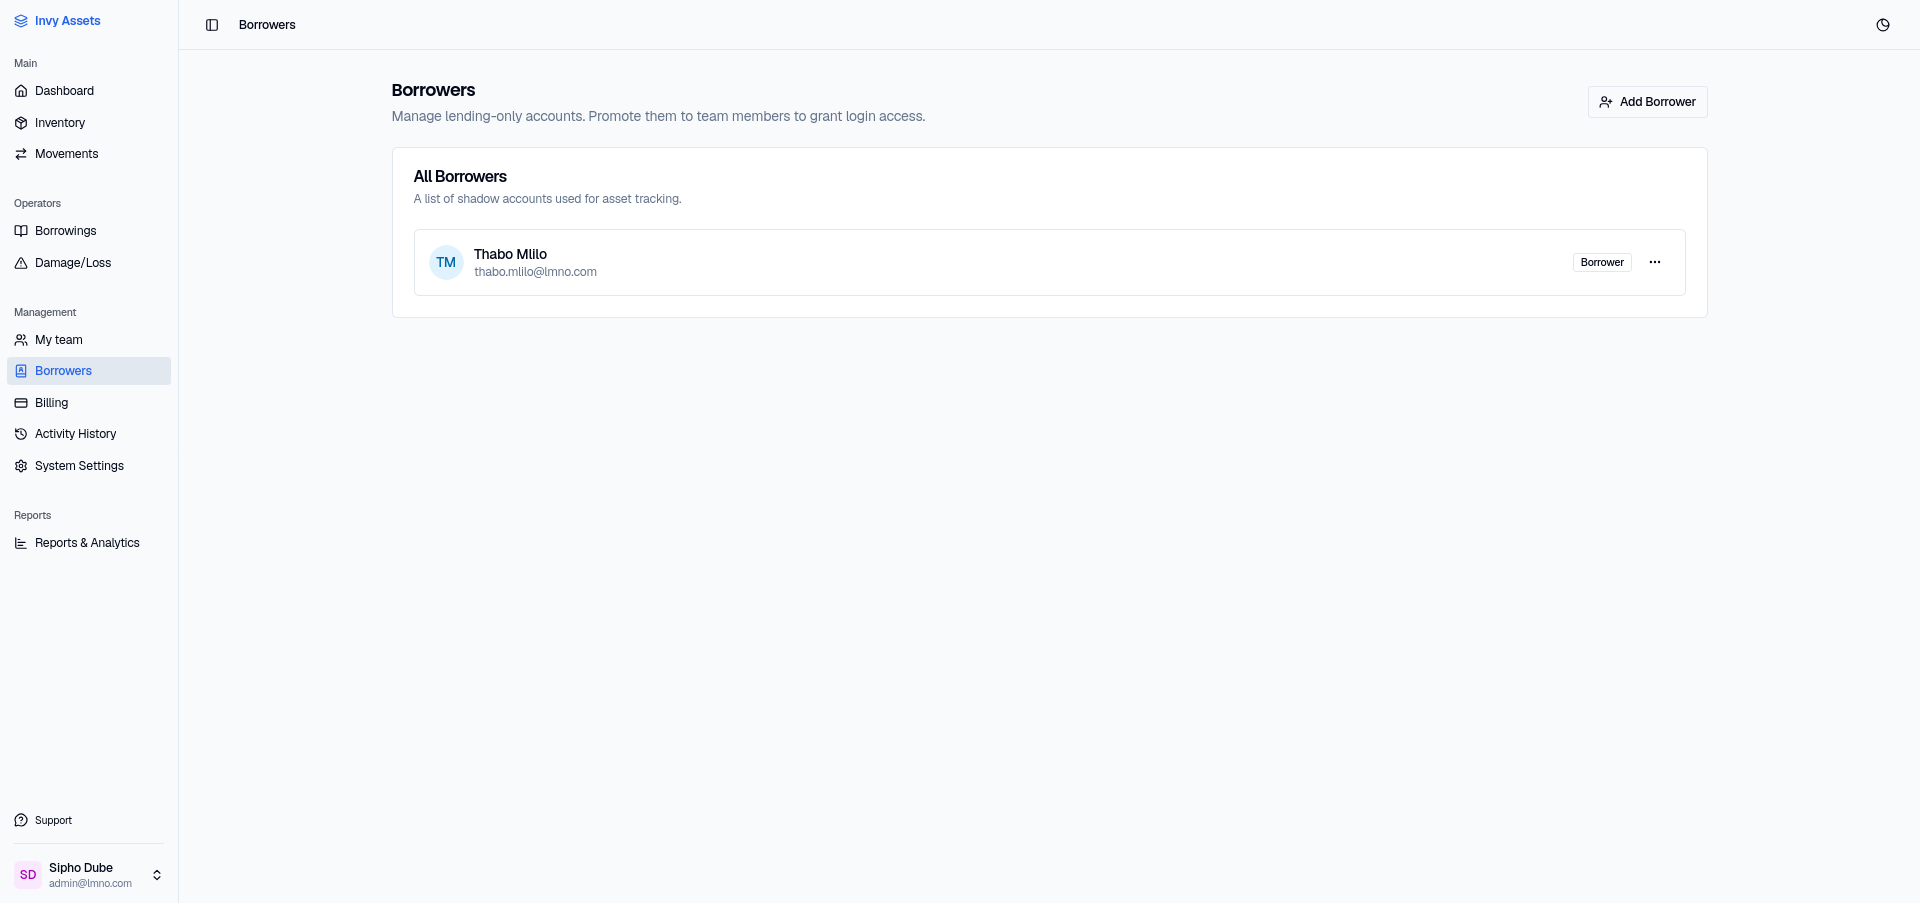
Everyone you’ve added shows up in the directory, where you can search for them, edit their details, or promote them to a full team member.
Lending a unit
- Find the unit (or select several units) you want to lend out.
- Click Lend in the selection toolbar (or the item’s Lend units option).
- In the Lend Assets dialog, pick a Borrower, a Start date and End date, and optionally add Notes about the loan.
- Click Lend Assets to confirm.
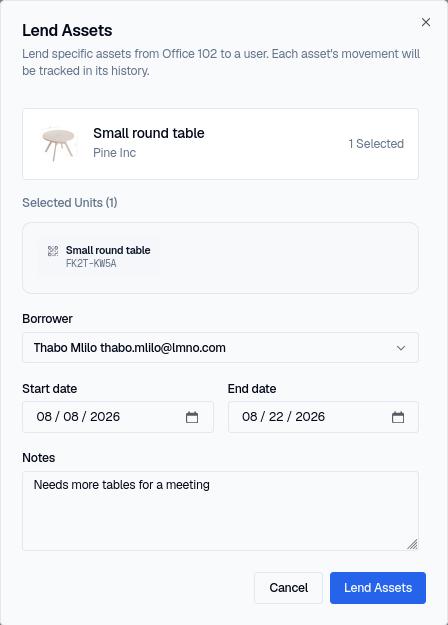
The borrower receives an automatic confirmation email with the item, dates, and who lent it to them.
Lending several units at once
You can lend several units — even a mix of different item types — to the same borrower as one loan. Select them all before clicking Lend, and the dialog heads itself Multiple items with a chip for each selected unit.
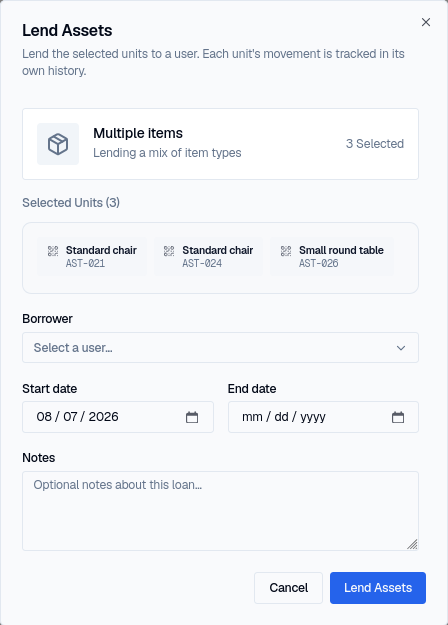
Invy groups these into a single loan with one booking reference and one due date, rather than creating a separate record per item. That’s what lets you hand the whole batch back in one action later.
Tracking what’s out
Open Borrowings from the sidebar to see every active loan: what’s out, who has it, and when it’s due.
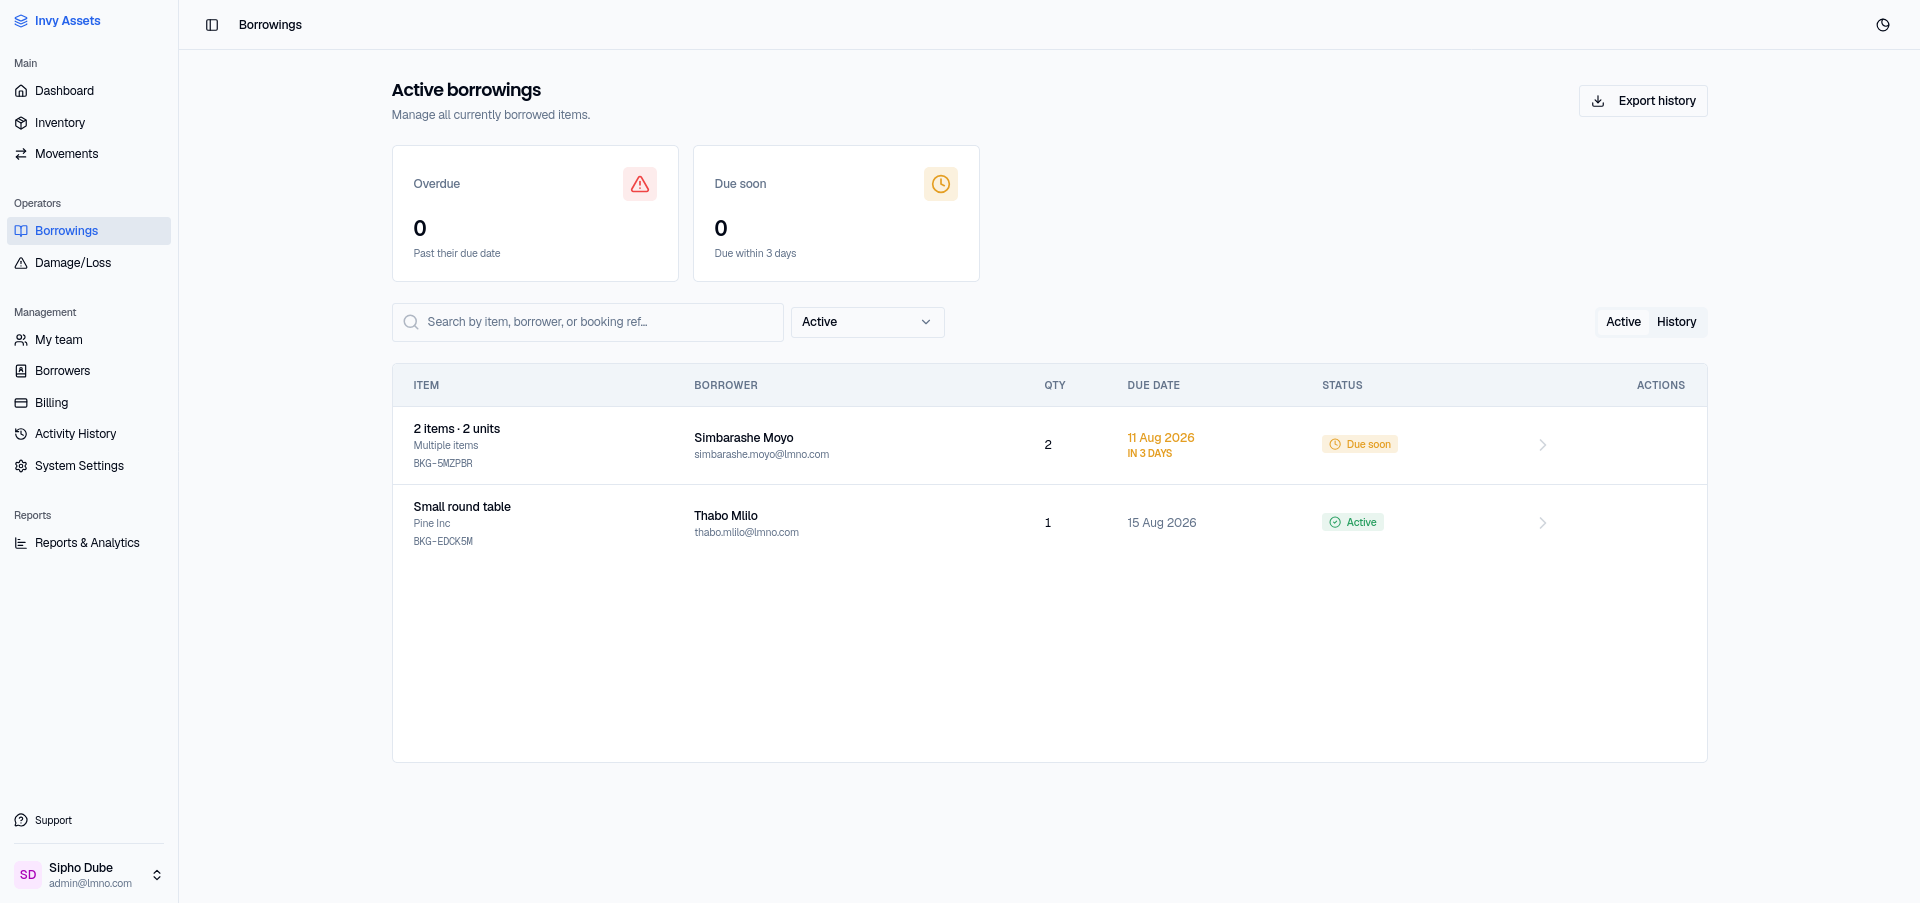
Loans are flagged as Active, Due soon, or Overdue so the ones needing attention surface first. Once every unit is back, the loan moves to Borrowing history.
From there you can:
- Extend due date — push out a loan’s due date
- Return selected or Return everything — hand back one, several, or all units from a loan
- Export PDF — download a record of an individual loan
- Export history — download the current borrowings list
Opening a loan
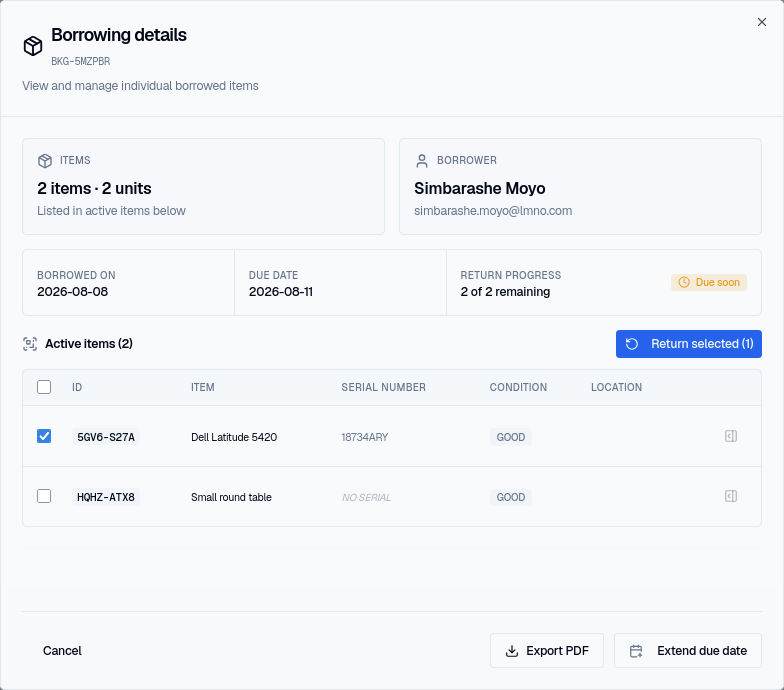
Click a loan in the Borrowings list to open its Borrowing details dialog. It shows the item, the borrower, the borrowed and due dates, and a Return progress counter — “1 of 2 remaining” — alongside every unit still out under Active items.
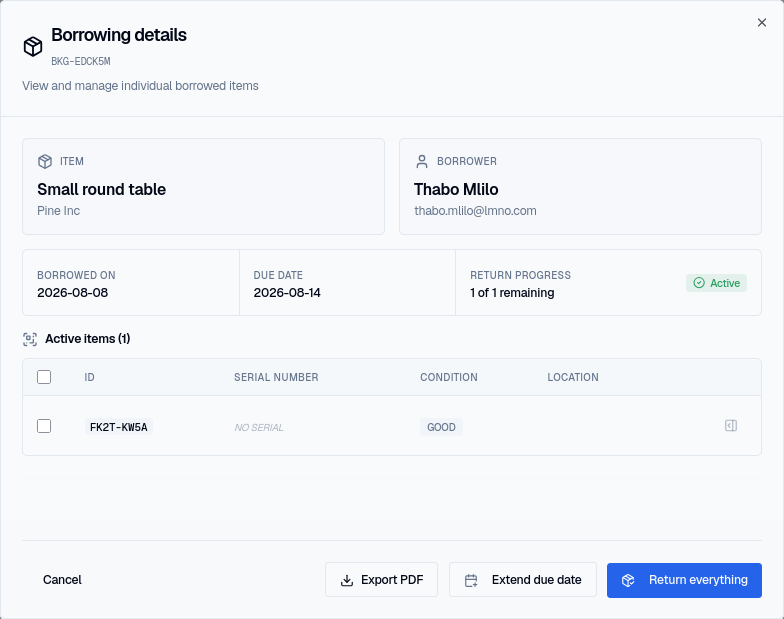
From here you can export the loan as a PDF, extend the due date, or return units.
Returning a unit
Tick the checkbox next to the units being handed back and a Return selected (N) button appears above the table. To close out everything still on loan, use Return everything at the bottom instead.
Either way, Invy asks how you want to record the return:
- Return all as good — mark every unit in this return as coming back in good condition. The fast path when nothing is wrong.
- Review each unit… — record the condition of each unit individually.
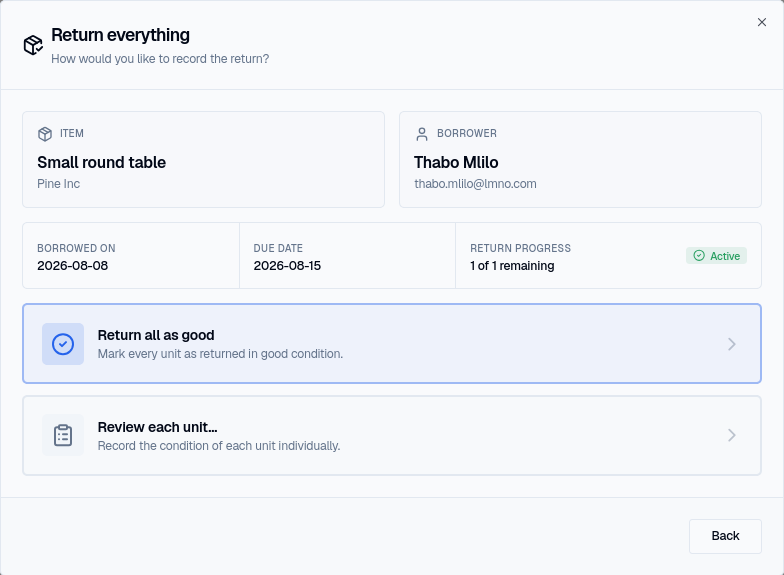
Return all as good only ever applies to units still out. Anything already handed back earlier in the loan is left exactly as it was recorded.
Recording condition on return
Choosing Review each unit… opens the Return checklist, with a row per unit being returned. Set Condition on return for each, and add optional Resolution notes explaining what happened.
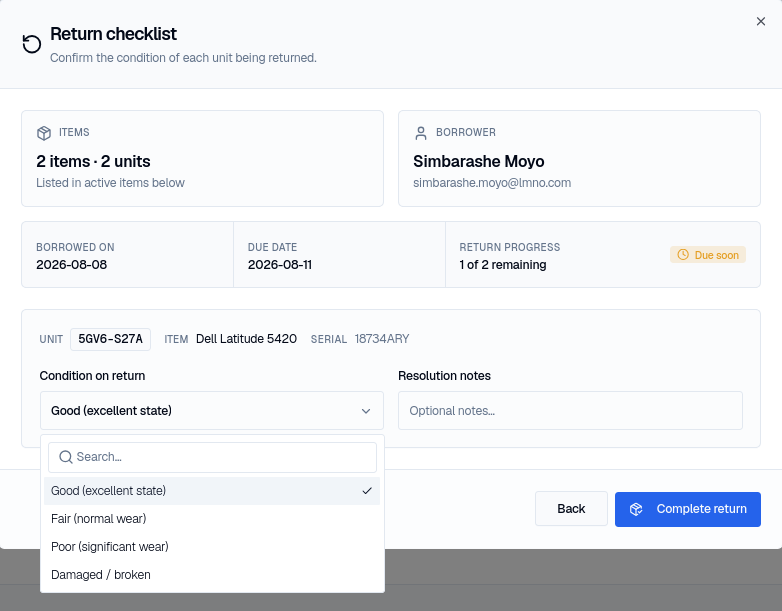
There are six options, and the one you pick decides where the unit goes next:
- Good (excellent state) or Fair (normal wear) — the unit returns to Available at its original folder, ready to lend again.
- Poor (significant wear) — also comes back Available, but the return is recorded as poor condition so you can decide whether to service or retire it.
- Damaged / broken — the unit is marked Broken instead of returning to circulation. See Damage & Loss.
- Lost / stolen (not returned) — the unit is marked Lost. It’s recorded as lost rather than counted among the returned units, so your return figures stay honest.
- Retire on return (end of life) — the unit comes back but is taken out of service permanently, marked Retired.
Scroll the dropdown to reach the last three — the list runs past the visible options above.
Whichever you choose, the unit is released from the loan and the outcome is written permanently to its own history and to Activity History, along with any resolution notes.
Partial returns
A loan doesn’t have to come back all at once. When some units are handed back and others stay out, the loan remains active and the details dialog splits into two tables: Active items for what’s still out, and Returned items for what’s already back — each with the condition it came back in and when.
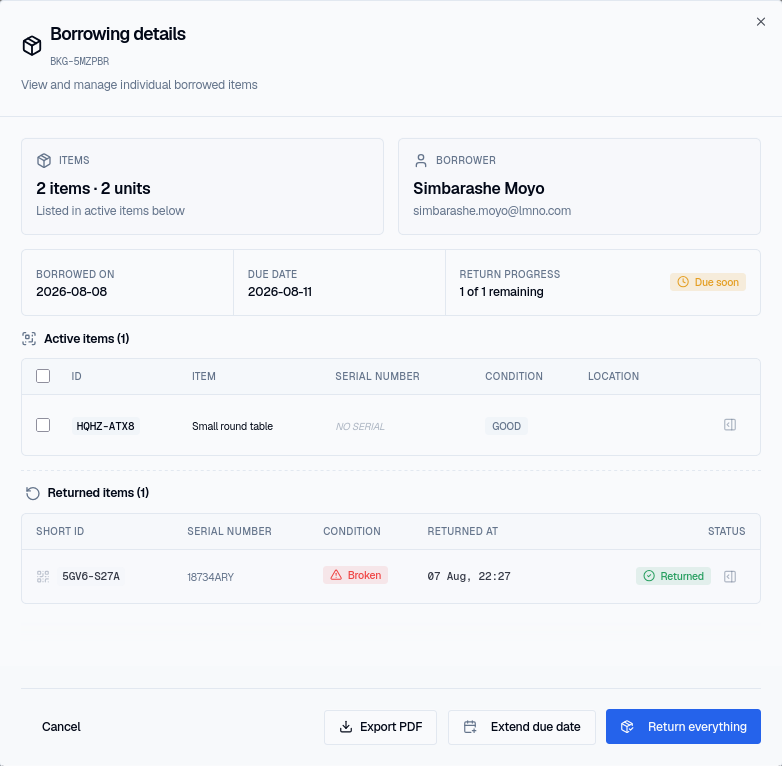
The Return progress counter tracks the remainder, and the loan closes automatically once the last unit is accounted for.
Extending a due date
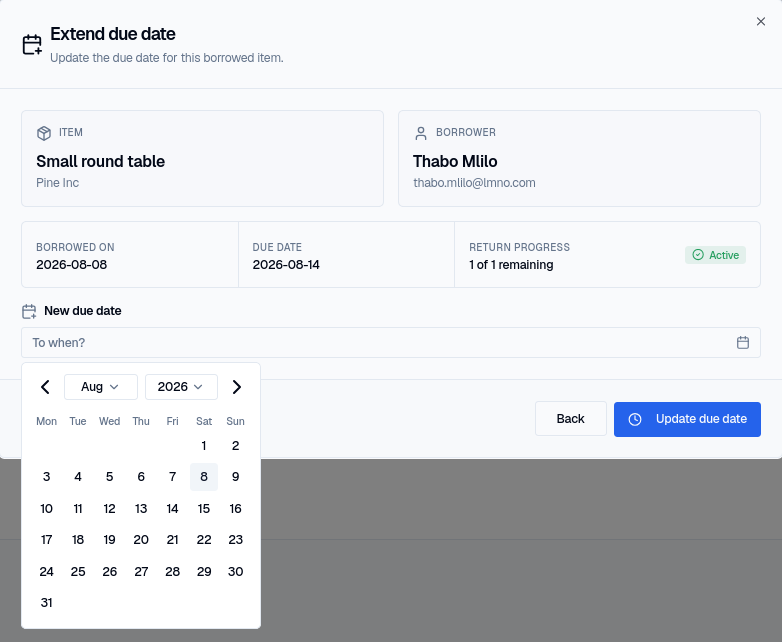
If a borrower needs longer, open the loan and click Extend due date, then pick the new date. The loan keeps its history — the extension is recorded rather than overwriting the original due date.
Past loans
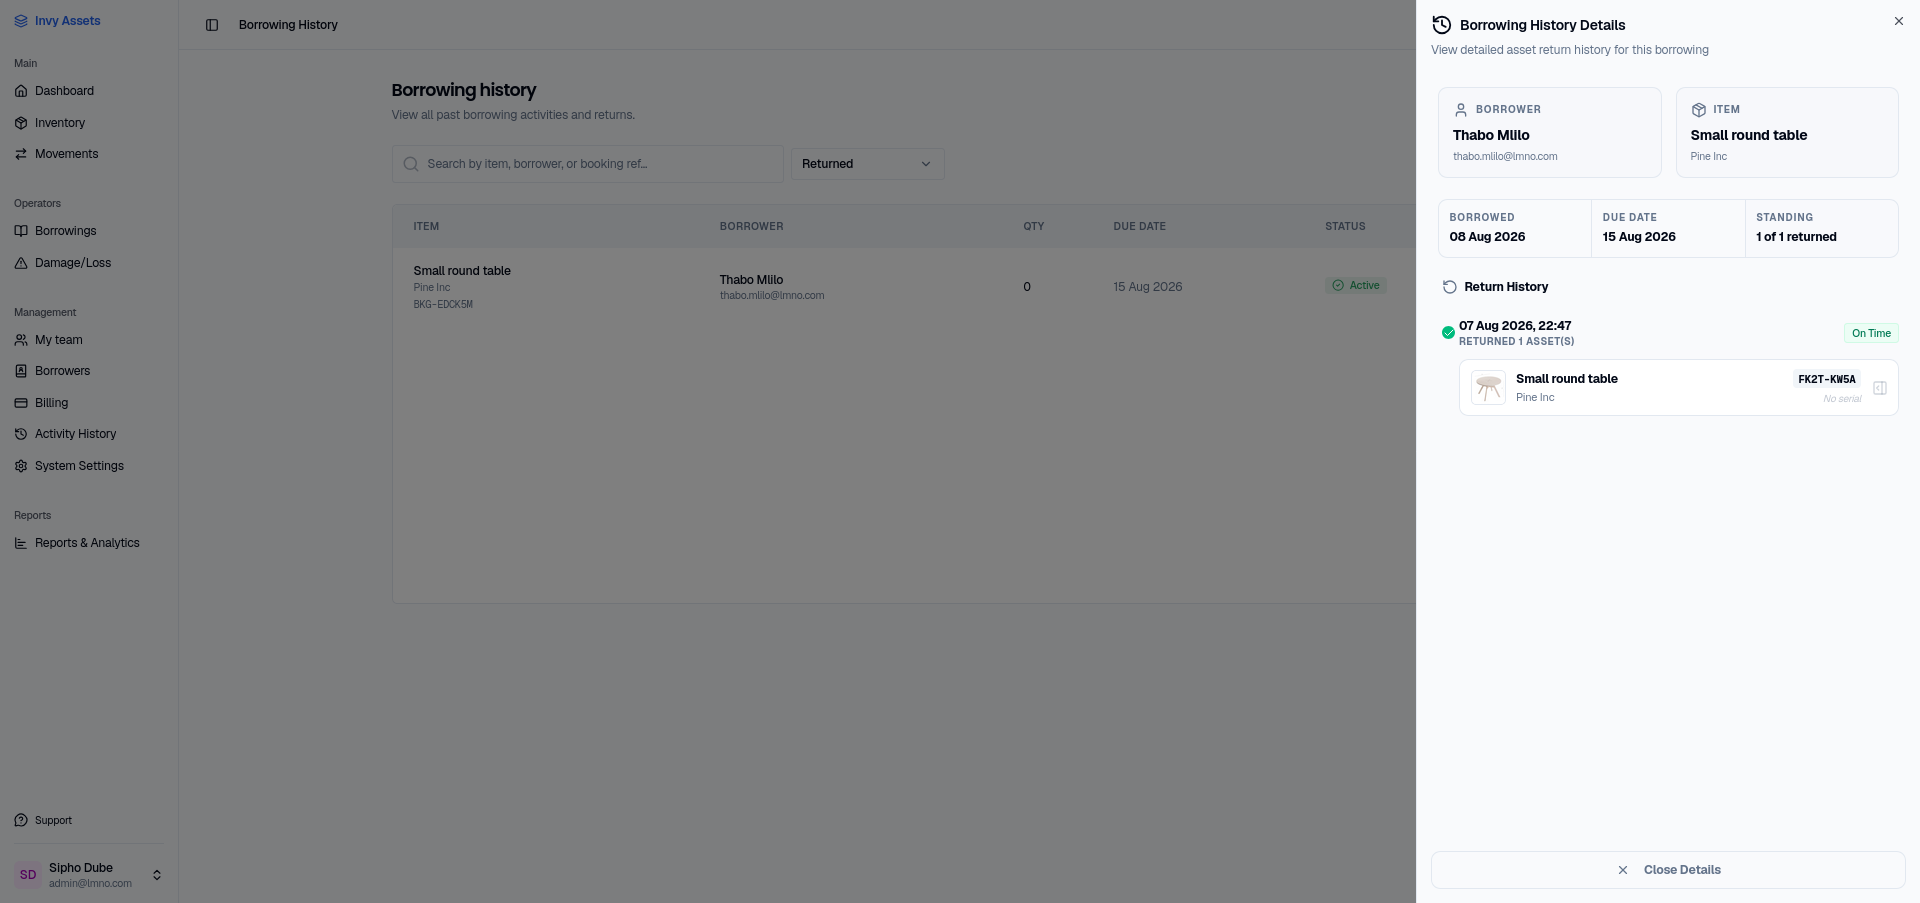
Borrowing history lists loans that have been closed out. Open one to see its Return History — each return event, when it happened, whether it was on time, and which units came back in it.
Next steps
- See who’s allowed to lend and manage borrowers — lending is gated by role.
- Report damage if something comes back in bad shape.