Items & Units
The difference between items and units, and how to add, place, and label them.
Invy tracks inventory at two levels:
- An item is the type of thing — “Dell U2723QE Monitor”, “Safety Harness Kit”. You create it once.
- A unit is one physical instance of that item, placed in a folder. If you have 18 monitors, that’s 1 item and 18 units — each with its own status, condition, and QR code.
Adding an item
Add Item creates the item and its first unit together in one step — you don’t add the item, then separately go place a unit:
- Open Inventory.
- Click Add Item.
- Fill in the Name (required) and, if you want, up to 3 photos, Category, Model/Brand, Folder (leave blank to file it under Unassigned), Condition, Serial/SKU, and Price.
- Click Add Item to save.
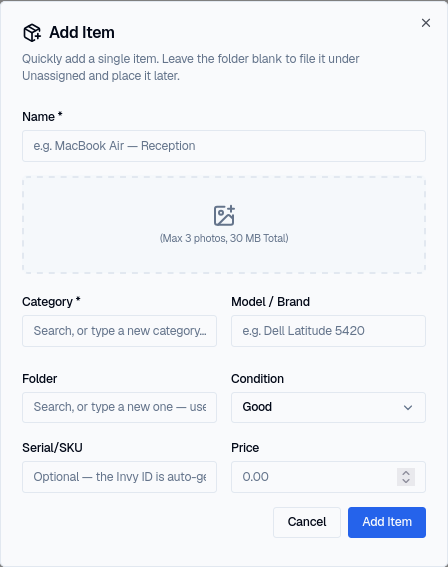
Invy generates a QR code for the unit automatically the moment you save — there’s no toggle to turn this on, and no separate step.
Adding many items at once
Use Add in Bulk on the Inventory page instead of repeating the single-item form. It’s the faster path when you’re onboarding a large existing inventory. Coming from a spreadsheet? Import via CSV instead — it creates items, folders, and units from a single file.
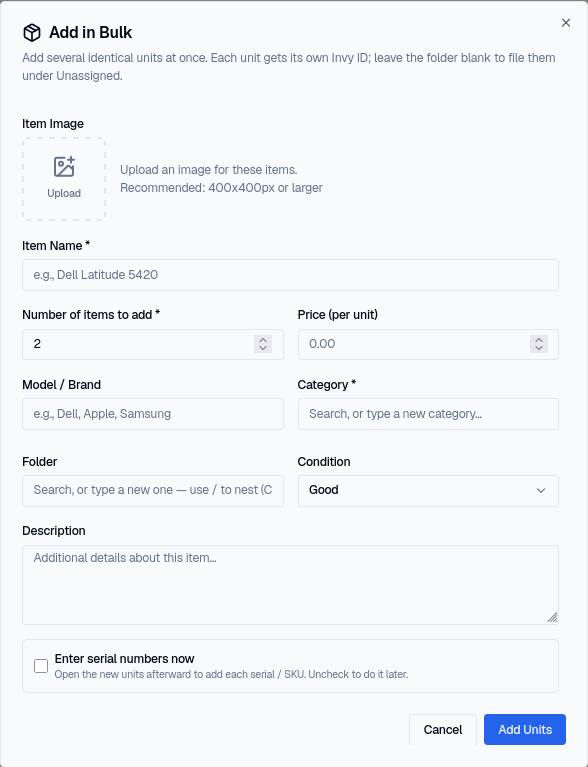
Add in Bulk creates several identical units in one go. Set Number of items to add, then fill in the details they share — name, price per unit, model, category, folder, and condition. Each unit still gets its own Invy ID.
Here’s the same dialog filled in to add four wooden round tables at $300 each to Office 102:
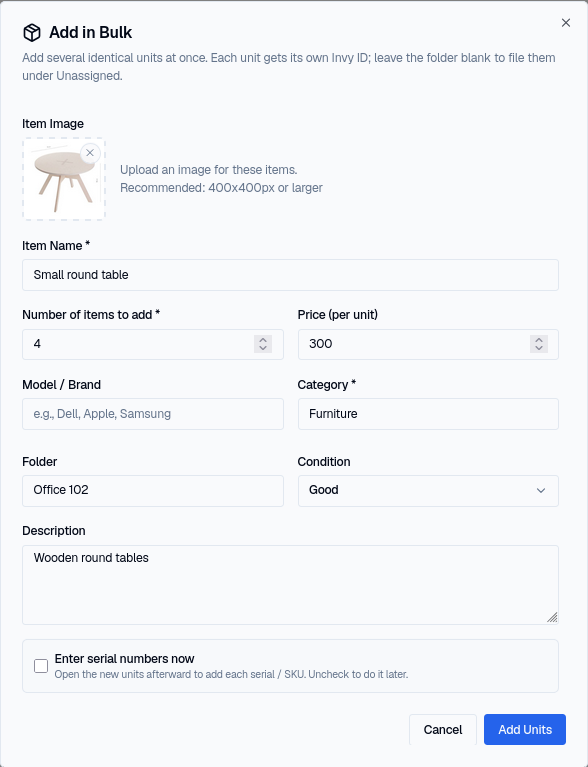
Leave the Folder blank to file the new units under Unassigned and place them later. Enter serial numbers now opens the new units immediately afterward so you can type each serial or SKU — leave it unchecked if you’d rather add serials later, or don’t track them at all.
Adding more units of an existing item
Already have the item and just need more units — the same monitor arriving in a new shipment, say? There’s no dedicated “add units to an existing item” dialog; use one of these instead:
- CSV import — the fastest path for any real quantity. Check Add units to existing items in the import dialog so a row matching an item you already have (same name and model) tops up its quantity with new units instead of being treated as a duplicate.
- Clone — select an existing unit of that item in its folder’s unit table and click Clone in the selection toolbar to duplicate it in place. Handy for one or two extra units without leaving the folder view.
For a genuinely new batch, Add in Bulk works too — it creates a new item row, so only use it if you’re fine with that (or don’t already have the item).
What’s on a unit
Each unit carries:
- Location — which folder it currently sits in
- Status — Available, Borrowed, Broken, and so on
- Condition — the physical state of that specific unit
- Serial / SKU — if you track individual serials
- Short ID (Invy ID) — a unique identifier for that unit, auto-generated but editable when you add it
Because units are tracked individually, two units of the same item can be in completely different states — one in stock in Warehouse A, another currently on loan. A unit that’s out reads Borrowed in the status column, and stays tied to its folder so you still know where it belongs when it comes back:

Status is set by what happens to the unit — lending it, returning it, reporting damage — rather than edited directly.
Viewing units and items
The Inventory list shows one row per unit by default, each with its own serial, location, and status. This is the view that reflects the two-level model directly — five Dell Latitude 5420 units are five rows, and one of them can read Broken while the rest read Available.
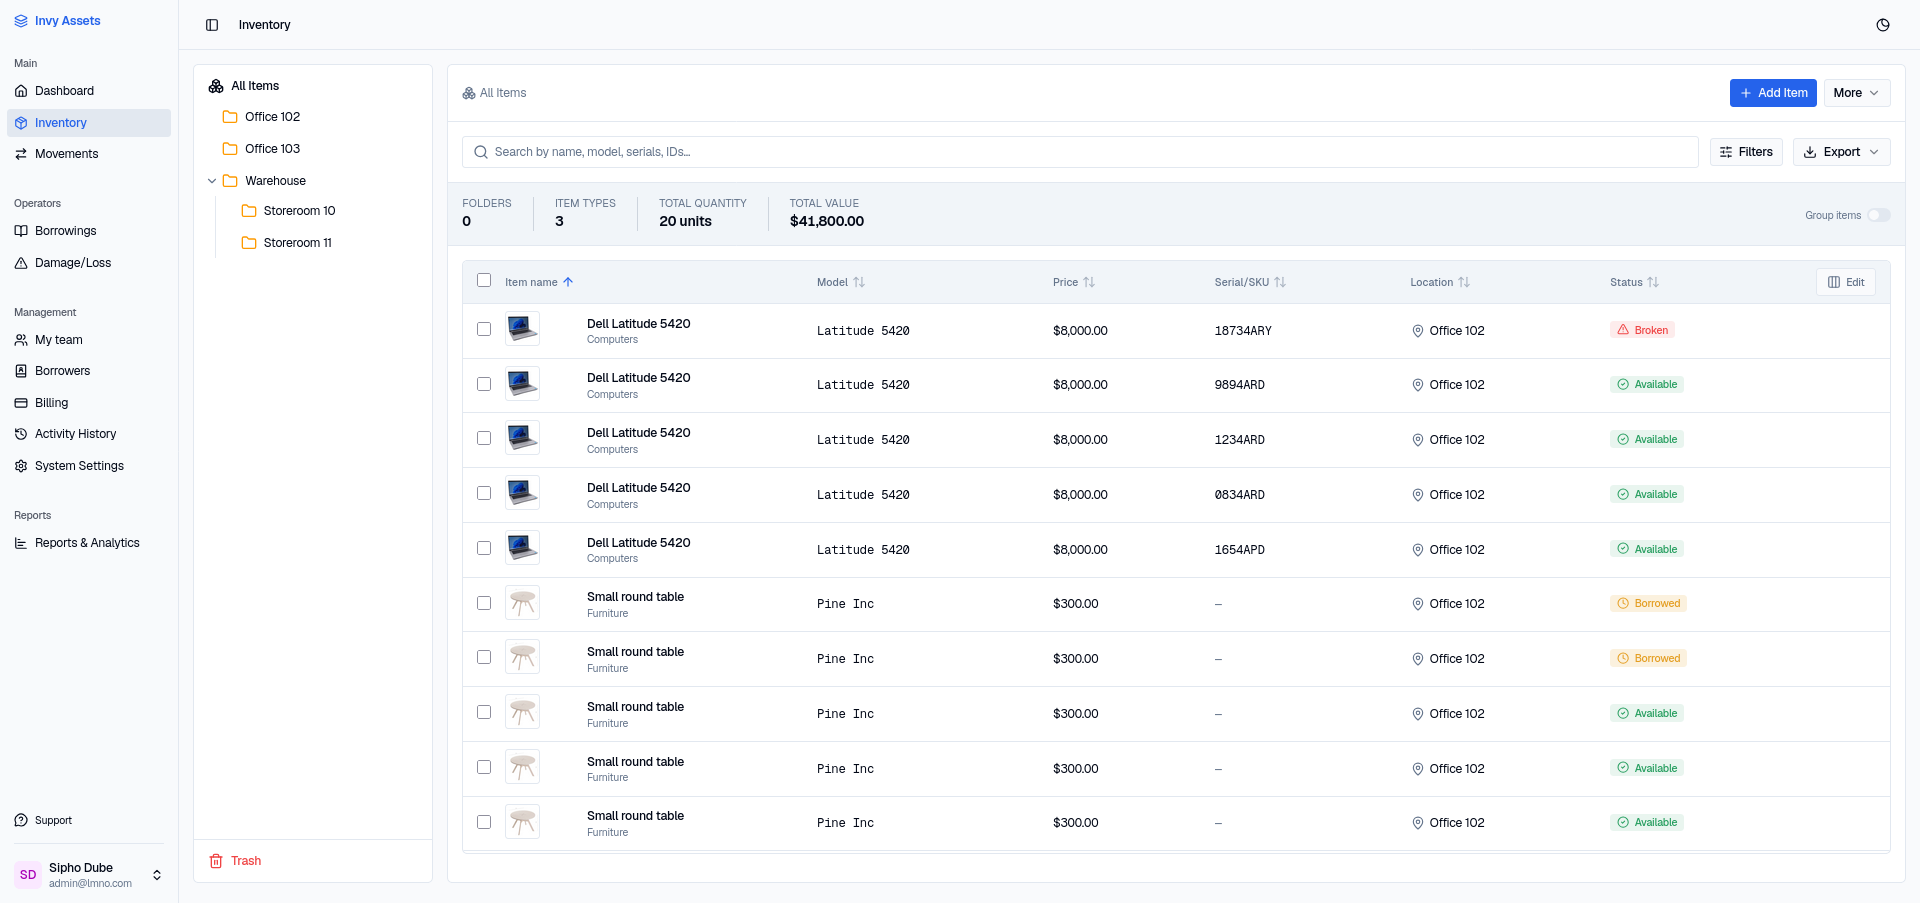
Turn on Group items, at the right of the summary bar, to collapse those rows into one per item instead — with its total Quantity, how many are Available, and the Total Value of all its units. Use the arrow at the end of a row to expand back into that item’s individual units.
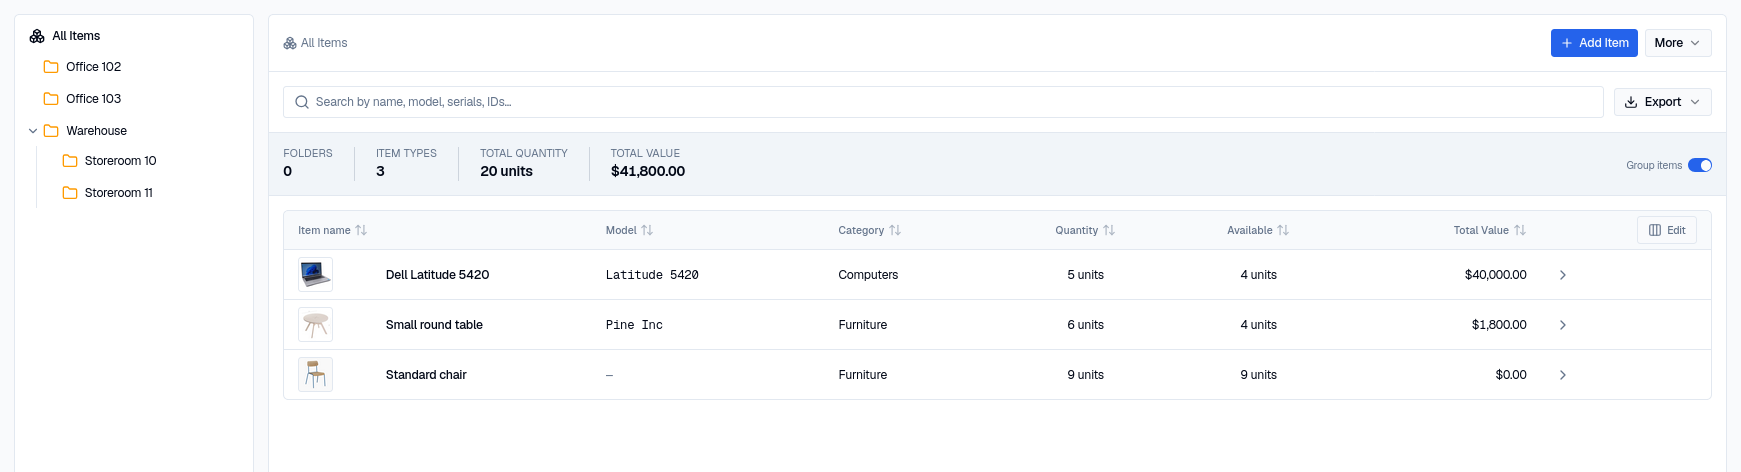
Grouped view is the quicker read for “how many do we have and how many are free”; ungrouped is what you want when you need a specific physical unit. The summary bar above the table — folders, item types, total quantity, and total value — reflects the folder you have selected either way.
Printing labels
Generate printable labels for units directly from the app — select units in your inventory and choose Print Labels. Each label carries your organization name, a QR code, and the unit’s Invy ID.
Scanning a label’s QR code with any phone camera opens that unit in Invy. The code resolves by the unit’s permanent internal ID, so renaming an item or moving it to another folder does not break labels you have already printed and stuck on equipment.
Invy supports A4 sheets, Avery L7160, and Brother, Dymo and Zebra label printers, and can add a Code128 barcode for handheld laser scanners. See Printing Asset Labels for choosing stock and getting your printer to produce correctly-sized output.
Deleting units
Deleted units go to Trash first, same as folders — nothing is gone for good until the trash is emptied. See Trash & Recovery for how to restore or permanently delete them.
Next steps
- Move units between folders as things physically relocate.
- Lend a unit to a person.
- Report damage on a unit that needs attention.
- Attach a receipt or warranty to a unit you’ve just added.
- Record a personal item that belongs to an individual rather than your organization.