Damage & Maintenance
Report damaged or lost units, assign them to a teammate, and track resolution against an SLA.
Invy’s maintenance workflow is reactive, built around reporting and resolving damage or loss — it isn’t a recurring preventive-maintenance scheduler with repeating tasks.
Reporting damage, loss, or retirement
Reports are filed from a folder’s unit table, not from the Damage/Loss page itself — that page is where you view and manage reports after they exist.
- Open the folder the unit is in and select its checkbox (select several to report them all at once).
- Click Report in the selection toolbar.
- Choose what happened: Damaged/Broken, Lost, or Retired.
- Fill in the fields for that choice:
- Damaged/Broken — a description, a priority (Low/Medium/High, defaults to Medium), and an optional estimated repair cost.
- Lost — just a description.
- Retired — a retirement reason (End of Cycle, Sold, Scrapped/Broken, Donated, Lost/Stolen, or Other) and optional notes. Sold, Scrapped, and Donated are permanent — that unit can’t be reactivated afterward.
- Click Submit report.
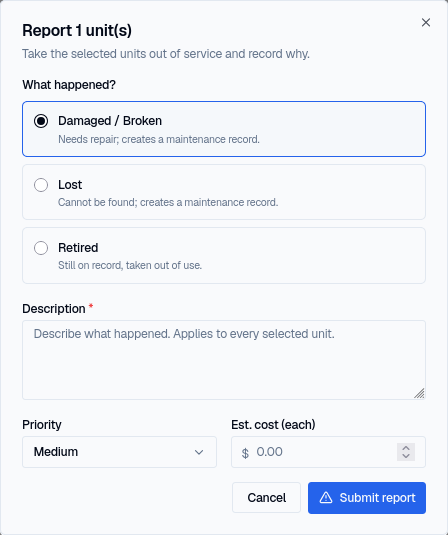
Damaged/Broken and Lost reports create a trackable maintenance record with an SLA due date, calculated automatically from your organization’s SLA settings for that priority. Retired units don’t get an SLA — they’re simply taken out of service.
Configuring SLAs
Your organization can set how many hours each priority level gets before it’s due:
- Go to System Settings → SLA Configuration.
- Set hours for Low, Medium, and High priority.
Any report submitted without an explicit due date uses these hours (from the report time) to calculate one. See System Settings for the default hours and the full Categories/SLA walkthrough.
Assigning and resolving
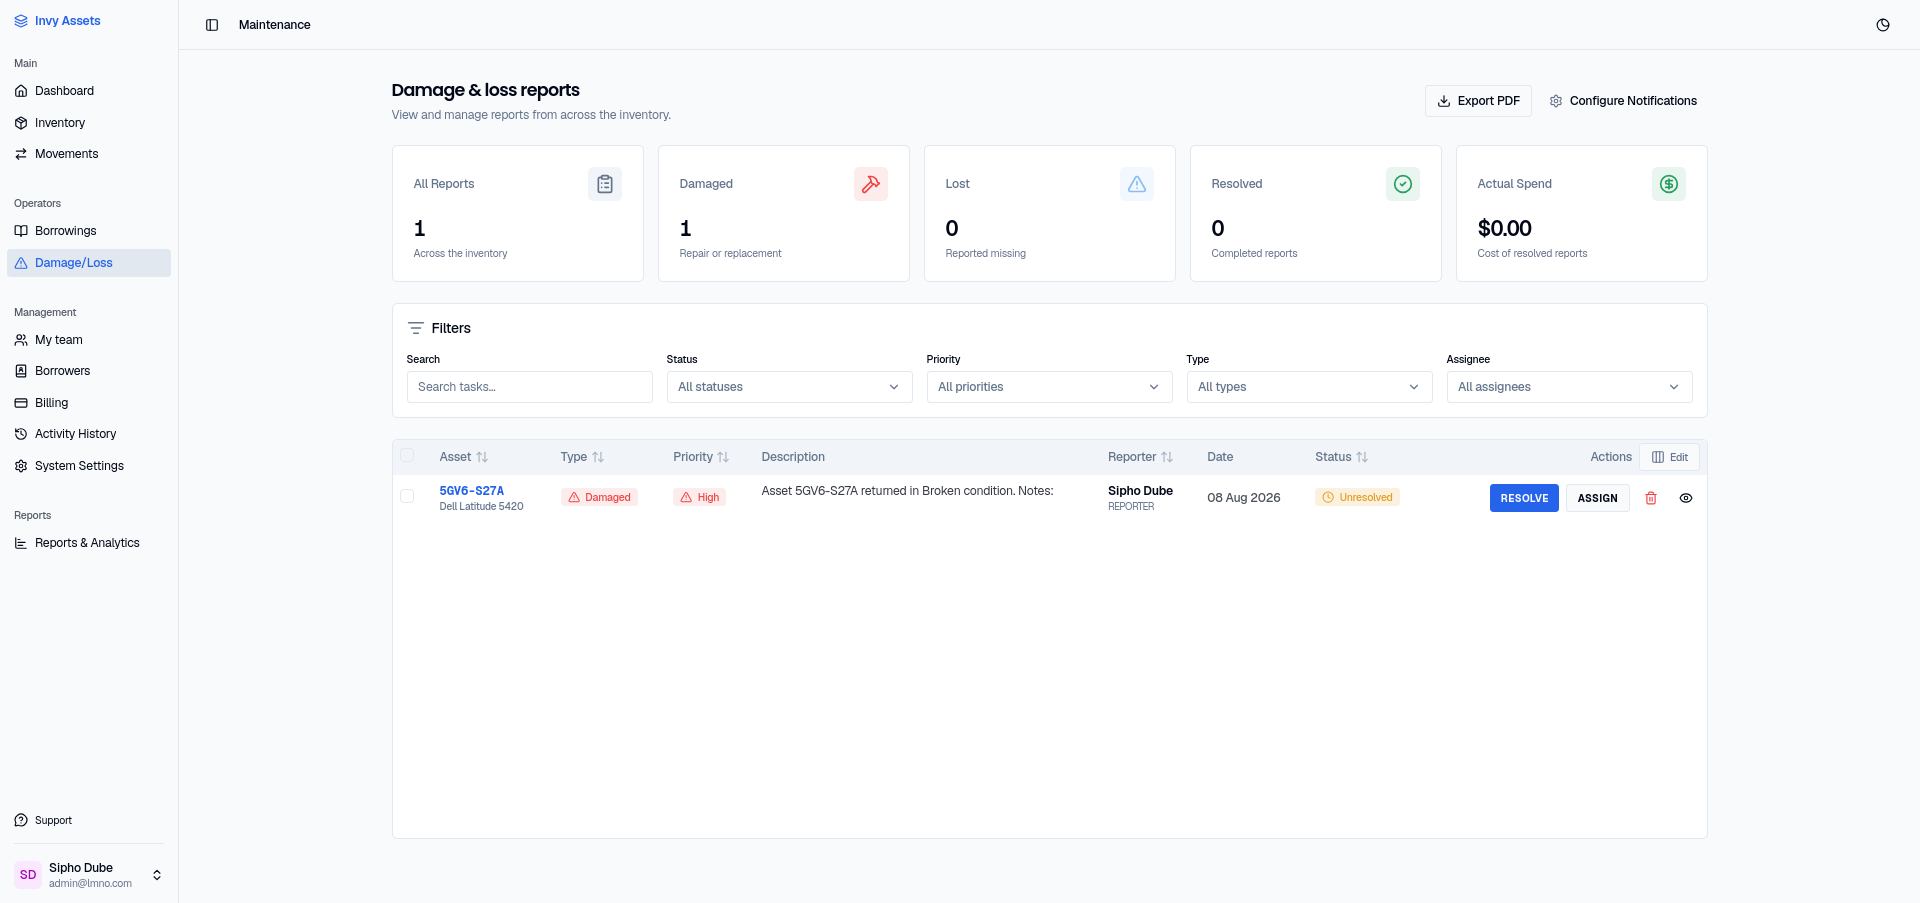
Once a report exists, open the Damage/Loss page — every open report has Assign and Resolve buttons right on its row:
- Click Assign and pick a teammate to own it.
- That person can add notes as they work on it.
- When it’s fixed (or written off), click Resolve and record the resolution and any cost.
You can also select multiple reports’ checkboxes and assign or resolve them together from the toolbar that appears.
Next steps
- See maintenance trends on the Reports page.
- Move a repaired unit back to its folder once it’s resolved.
- Attach the repair paperwork to the unit so it stays with the equipment.